There are large number of blogger post widgets but among them only few are popular , Just like recent post widgets , this widget is one of the most popular and widley used widget used by more then 80% of bloggers in there blogspot webpages .
With the help of feed and Java bloggers have created this widget that display all recent post publish recently in yours blog post ,You only need to enter java code in yours blogger or wordpress layout ,which you can do either manually or directly.
Recet Post Widget
To create Recent Post widget, Log In to yours Feedburner account , and then change the red coloured text to your blog name and burn that URL in Feedburner.
To create Recent Post widget Log In to yours Feedburner account , Open yours FeedGo to Publicize-> Click BuzzBoost ( left side ) -> From there you can create yours recent post widgetaccording to yours preference ,this widget works on feed ,and it works only when yours feed are enabled .
Recent Comments Widget
To create Recent Comments widget, Log In to yours Feedburner account , and then change the red coloured text to your blog name and burn that URL in Feedburner.
Then, open yours FeedGo to Publicize-> Click BuzzBoost ( left side ) -> From there you can create yours recent comments widgetaccording to yours preference ,this widget works on feed ,and it works only when yours feed are enabled .
Here's what it means. If you want to quickly change some colors or fonts, you'll go to the Layout --> Fonts and Colors page like the one on top. This is the easiest way to customize your own template if you don't know how to play around with the code.
But sometimes the things you can change are limited. For example, if you use the basic templates provided by Blogger, you have only about 10 - 20 items to customize. Other free templates also provided a limited number of things to change from, at most probably about 40 items. But when using the templates provided here at Rethnaraj V2, you can change around 70 - 100 items, depending on the templates you use. That's way a lot more than the rest. This option is great if you got easily bored looking at the same templates, or if you want something a little bit different with your own taste.
If some of the items you want to customize don't change if you choose different colors or fonts, don't worry because those items might have been left there from a previously designed templates and are not meant for the templates you're using. The rest of the customizable items will work just fine.
If you're still not sure what I mean by all this, just try using one template designed here on a test blog that you can easily create (don't try on your main blog yet if you're not sure). You'll see how easy it is to customize the template.
As you can see at the bottom of this blog, I have three columns in the footer section, followed by a wide section which I use to feature the main blog links. This style is fast becoming common in Web 2.0 style websites and blogs, and is quite easy to duplicate in Blogger templates. In this tutorial, I will explain how you can add these extra columns to your own Blogger blogs.
Adding extra columns to your footer section will provide more valuable space for blog widgets, and also contribute a modern "Web 2.0" appeal for your blog design.
There are only four main steps to this tutorial, and I'm sure you'll agree that the overall process is quite simple. I have taken into account that different blogs have different widths and styles, and so have designed a fluid solution which should work in any Blogger layouts template.
Creating the new columns
Here are the four steps needed to transform the footer section of your blog template:
Back up your existing blog template!
Before making any modifications to your blog template, it is essential that you make a back up of your existing template. Then if you make any mistakes, or decide you don't like the new look, you can easily revert back to this design.
To back up your existing template, go to Template>Edit HTML in your Blogger dashboard, and click on the "Download Full Template" link near the top of the page. You can then save your existing XML template file to your computer.
Move all existing widgets from the existing footer section
In the Layouts section of your Blogger dashboard, move all widgets which are present in your footer section into your sidebar (or other section) instead. This is only temporary, as you can move them back later once we have finished adding your new footer section. Most importantly, this ensures that you don't lose these widgets during the modification, and makes it much easier to complete.
Add extra code to your footer section.
Go to Template>Edit HTML in your Blogger dashboard, and do not check the "expand widget templates" box (this simplifies the process).
Now you need to find this section in your template:
<div id='footer-wrapper'>
<b:section class='footer' id='footer'/>
</div>
Please note that this particular section may be called something slightly different in your template, eg: "footer-wrap" or "footer". In the case of Rounders templates, you may notice that there are in fact two DIV sections around the footer section. In any case, all we need to change is the line highlighted in red.
Replace the entire line highlighted in red with the code below:
It is a good idea to save your template at this stage, before we add just one small section of code to style the new footer section and ensure that the widgets don't get pushed beneath each other when you add them later.
Adding style for the new footer section
Once again, open the Edit HTML section in your Blogger dashboard. This time, you need to find the closing "</b:skin>" tag, which is where the style section of your template ends.
Immediately before this line, add the following lines of code:
#footer-column-container {
clear:both;
}
.footer-column {
padding: 10px;
}
And save your template again. The style in these lines of code ensure that the footer column don't get too bunched up, or slide beneath each other in the layout of your template.
Now you have finished adding these new sections to your footer, go to the Layout section of your Blogger dashboard (Template>Layout), and you will see the three new column, plus a lower section which spans the width of all three column, to which you can now add new widgets!
I added a horizontal line to the footer section to ensure that there is a clear distinction between content in the footer columns and content in the wider section beneath. If you would like to change the color of this line, you can do so by replacing the hex color values in the line below (highlighted in red) with a different color:
<hr align='center' color='#5d5d54' width='90%'/>
If you are unsure of the hex value for the color you prefer, you can refer to the Color Calculator in the tools section of this site.
If you would prefer to remove the line altogether, simply delete the whole line.
I hope this tutorial enables you to customize your footer section with ease, so you can add more widgets and content to this area of your blog template.
The import and export features on Blogger give your content a whole new range of portability and freedom, allowing you to create copies of your own blogs as well as import them into other existing ones. Best of all-we've made this a very simple process!
Import as a New Blog
To import content as a brand new blog, click Create a Blog from your dashboard.
Then under Advanced Options, click the Import Blog Tool
Finally, choose the Blogger export file (.xml) from your hard drive and fill out the word verification. Click the Upload arrow and your new bog will be created instantly!
Import Into an Existing Blog
To import posts and comments into an already existing blog, start by clicking Import Blog from the existing blog's Settings | Basic tab.
Note: Your template will not be affected by the imported content.
Next, choose a Blogger export file (.xml) from your hard drive and fill out the word verification beneath. By default, all of your imported posts will remain unpublished until you publish them from your dashboard later. However, if you would rather have all posts published immediately, make sure to check the box next to Automatically publish all imported posts before you click Import Blog.
If you did not choose to have your posts publish automatically, you will need to manually publish them from the Posting | Edit Posts tab before they will appear on the web. You can either publish all the posts at once by clicking Publish all imported posts, or publish individual posts by selecting them and then clicking Publish Selected.
Exporting Your blog
To export your blog, simply click Export Blog from the Settings | Basic tab.
Finally, click the Export Blog button. You blog will be stored as a Blogger export file (.xml) file which can be kept as a backup on your hard drive or imported into another blog.
Note: Exported blogs are not deleted from your dashboard or Blogger.com
Ever wonder how much your blog is actually worth? Well, unlike cars there’s no blog blue book so the value of one’s blog can depend on many different factors.
I came across this cool blog calculator which is a quick and easy way to get a ballpark figure of what your blog may be worth if you ever decide to put it on the market. Not only will it calculate your approximate blog value, it will create a cool little widget you can add to the sidebar of your blog. Before you get too excited, remember that this calculator is only looking at things from one perspective.
How Does It Work?
The blog worth calculator measures your blog’s value based on the incoming and outgoing links according to Technorati’s data. It does not, however measure your brand, quality or amount of content, domain name age, traffic, revenue, or other important factors that can ultimately decide what your blog’s market value may be.
The buyer can also be a huge factor in determining the price. If Joe Blow wanted to buy my blog for a personal project, chances are he wouldn’t offer me much money. On the other hand, if an actual company with money in the bank was looking to get a jump on a competitor, they might be willing to pay you much more. That’s actually what happened in my case and I was pleasantly rewarded for selling one of my blogs last year.
After punching in my url, it told me this blog is worth $564.54. That’s a very nice valuation and I wish the market demanded that price but since my blog is only a few months old, I feel it’s inaccurate. I do, however have a high number of inbound links which is why the value is so high.
Go ahead and put in your website url to figure out how much your blog is worth. Post your results and website url below in the comments area as I’d be interested to see some other sites to compare against.
You have to admit, most free 3rd party Blogger templates that you download are a mess. You open up the xml file and it’s a long and ugly-looking beast of code spaghetti. If you’re like me, you prefer a nice and neat template (even though you’ll be the only one seeing it) and you’ll want to tidy it up.
Most of the code you don’t want to tinker with but the .css code (the part that styles your entire blog with images and colors) is where some people like to change font colors, sizes, or even just space it out properly so it’s important that it’s not only neatly organized, but also properly aligned.
More importantly, did you know the more lines of code your template has, the longer it takes to load in a browser? So your 1,500 lines of code in your newest Blogger template could really be much shorter in size, thus speeding up page load times for your visitors. The slower your site, the more likely a visitor will be deterred and not wait for it to load up.
So here’s a neat trick to optimize your template. I’ve started doing it with some of the newer templates now being hosted on eBlog Templates. You’ll want to do what’s called “commpress your css” into a much smaller format. There’s a site I use called CSSDrive that offers a free web-based CSS Compressor. All you do is select a few basic options like compression mode and comments handling and then paste in your css. The css is the code between the <b:skin> and </b:skin> tags.
Make sure you backup your template code before doing this! Some people might not like how the css looks after it’s compressed so it’s best to have a backup. You also might make a mistake and copy the wrong sections which could screw up your template code. Bottom-line, backup your template before doing this.
After you click on the “Compress-it!” button it will go through your .css code and shrinks it down. Essentially it removes unnecessary white spaces and better organizes each css element into one line. Here are the results for one of the Blogger templates I compressed.
My xml Blogger template was originally 1,286 lines of code and after the css compression was done, it dropped it down to 914. Now that’s not a huge difference (14%) and you probably won’t notice a difference when you load up your blog with the new code, but every little bit helps. Also, some template code might be messier than others so the size decrease could potentially be a lot more.
I also just ran the normal compression mode and wanted to keep my comments so if you go with the super compact mode and strip out all comments, you can compress it even further.
This tool can be used for WordPress blogs or any other websites actually. Most of the Blogger templates I come across are the ones in need of a code clean up, however. So if you’re ready to give CSS Compression a shot, check out CSS Drive’s free tool and compress away!
This is a pretty popular Blogger hack that lots of people need for their blog. Actually for this post, I referred to eblogtemplates.
With this hack, you can choose to display a select amount of text from the beginning of each post as a teaser instead of showing the entire post on the front page of your blog. Then when people want to read the rest of the post, they can click a “read more” link to see the full post. This is very handy if you have lots of long articles all on one page. (Note that you’ll need to have post pages enabled in order to make this feature work.)
Step #1 - Update Your Template Code
First you need to edit your existing code so I recommend copying and pasting it into notepad or any text editor. Also, it’s smart at this point to create a backup of your template just in case something goes wrong. Now do a search (CTRL + F) within the text editor for the following code post-header-line-1. This is the default code that Blogger includes but some custom templates remove or change this code so you might have trouble finding it. If you can’t locate this text then try searching for <data:post.body/> instead. Your template will for sure have this since it’s the tag that actually prints the body of your post.
Now depending on which code you were able to find will determine how easy the next steps will be. You might need to do some detective work first in order to get this working properly in your custom template. The idea is to get this new code into your template before the <data:post.body/> tag. Keep reading and hopefully the explanation will illustrate the concept clear enough so you are able to adapt this hack to your custom template.
Add the following code below the <div class=’post-header-line-1′/> and <div class=’post-header-line’> tags if you’ve got both.
<b:if cond='data:blog.pageType == "item"'>

<style>.fullpost{display:inline;}</style>


<p><data:post.body/></p>

<b:else/>

<style>.fullpost{display:none;}</style>
The result should look something like this:
If you don’t have the default <div class='post-header-line-1'/> tag then your result should look something like this instead. This is how it would be done in the MushBlue Blogger custom template:
Notice in both examples that the code in yellow and the <data:post.body/> tags are the same — it’s just tag above it that will differ based on the template you’re using.
Now let’s add one more bit of code which will actually create the “read more” link in your post. This code will go below the <data:post.body/> tag so copy the following and paste it in. Feel free to change the “Read more…” text to whatever you want the link to look like. Be careful not to delete any other code during this process.
<b:if cond='data:blog.pageType != "item"'><br />

<a expr:href='data:post.url'>Read more...</a>


</b:if>

</b:if>
Yes, there are supposed to be two </b:if> tags in the above code so don’t think it’ s a mistake. The result should look like this:
This code will be the same no matter what template you are using. Just make sure it goes below the <data:post.body/> as shown in the image above.
Now let’s look at what the final result should be. Here’s the updated code block you just worked on all put together:
Ok, you’re all done editing the template code. Paste it back into your Blogger html window and save it. If you get an error, you made a mistake. The most common mistake is to accidentally delete a > or < while pasting in the new code. If it saved successfully, it’s time to move onto the next step and modify a quick Blogger format setting.
Step #2 - Add a Class Tag in Your Default Post Template
For this step, you need to navigate in your Blogger account to “Settings” => “Formatting” and scroll all the way down to the bottom. It’s the last option called “Post Template”. You’re going to paste in the following code:
<span class="fullpost">
</span>
You’ll want to keep the spaces in there which will make sense later. After you save this, it will look like this:
Step #3 - Create a New Post
Ok, we’ve got everything all setup so it’s time to go and test it out. Hopefully you’ve got a new post in mind for your blog. If not, then we’ll just create a test post which you can later delete. When you click on the “Posting” tab, you’ll notice that the post text area is now pre-populated with the <span class=”fullpost”> and </span> tags. If not, then you didn’t save it properly so go back and re-read step #2.
So when writing your new post, anything you put above the <span class=”fullpost”> tag will be the teaser text. The main body of your post needs to go in between the <span class=”fullpost”> and </span> tags in order for the “read more…” link to work properly. See the screenshot below. Sometimes pictures illustrate better than words.
Now publish or preview your post to see the “read more” hack working on your blog. If it doesn’t show up for some reason, go back and run through the steps again. Most likely you pasted the code blocks in the wrong places. It’s difficult to troubleshoot these issues since each template can be unique so please make sure to double-check your template before asking for help in the comments section below.
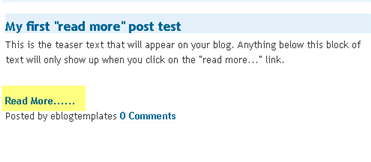
Here’s the live post with the “read more…” link properly working based on the text I used above in the post text area.
Additional Info
If you want to go back and update your old posts with this new “read more…” feature you can. Just go back and edit each post manually. Essentially you’ll need to paste in the <span class=”fullpost”> and </span> tags breaking apart the post into two parts.
For some posts, you might not want to use this feature at all. If that’s the case, just delete the <span class=”fullpost”> and </span> tags from within your new post text area. Then your new post will show up entirely just like it used to before you implemented this hack. Enjoy!
Technorati has been of great use to bloggers while building their blog.
The Technorati Blog Reactions widget is very easy to install in Blogger powered blogs, so if you're interested in adding this link beneath your own blog posts, here is how this can be achieved.
Instructions to add Technorati Blog Reactions Widget
Go to Layout>Edit HTML in your Blogger dashboard, and check the "Expand Widget Templates" box.
Find the following line of code in your template (an easy method is to use the CTRL+F keyboard shortcut:
<p><data:post.body/></p>
Immediately after this line, copy and paste the following section of code:
<a expr:href='"http://technorati.com/search/" + data:post.url' rel='linkcount'>View blog reactions</a>
Finally, save your template!
Once you have installed this widget, Technorati will update each individual post featuring this widget to include the number of blog reactions. It may take a few moments to come into effect, so don't worry of you don't see the effects immediately!
Here is the complete tutorial on how to install blogger templates downloaded from this site..
1.First download the template and unzip the file using winrar or winzip. After extracting the file you will see a folder named Images(incase if you lost) and an xml file.
2.Now, sign in to Blogger dashboard and click on the layout.
3.Here is the important step, after uploading any new Blogger template, all of the previous widgets like your google adsense ads,text,profile,poll,etc etc will be lost. So, to avoid this to happen, in this step click on 'edit' on all the widgets and copy the codes into notepad,etc.
4.Next, click on the 'Edit html' tab
5.You'll see an option to download the current template, so do it!
6.Just below that,there's an option of uploading new template.So, use the Browse button and upload the downloaded xml file(which we discussed in step 1).
7.Now, a message appear saying that your widgets are about to be deleted.Click on the Confirm & Save (no problem doing this because we already copied the widget codes in Step 3).
Now you successfully installed the template :) Click on the 'Page elements' page now and add the codes that you copied in step3 using the 'Add a Page Element' option.
 I'm Raj, College student, Blogger, Tech crazy. I live in Kuala Lumpur, Malaysia.


 Ever wonder how much your blog is actually worth? Well, unlike cars there’s no blog blue book so the value of one’s blog can depend on many different factors.